
How to Fix Cracked Air Dry Clay: 10 Easy Repairs That Actually Work

There is nothing more frustrating than spending an afternoon shaping a beautiful air dry clay piece, only to find thin cracks creeping across it the next morning. Whether it is a delicate jewelry dish, a handmade vase, or a set of ornaments, cracks can make a project feel ruined before it even reaches the paint stage.
The good news is that most cracks in air dry clay are completely fixable — and many of them are preventable once you know why they happen. So how do you rescue a cracked piece and make it look smooth and strong again?
1. Smooth Hairline Cracks With Water and Your Fingertip

Hairline cracks are the most common kind, and they are also the easiest to fix. They usually appear as the clay dries and the surface shrinks faster than the inside. Catch them early and they will disappear almost completely.
Dip your fingertip in clean water and rub it gently across the crack in small circles. The moisture softens the surface just enough for the clay particles to bond again. Work slowly and keep the area barely damp — too much water will make the surface slimy and weak.
Let the piece dry fully after smoothing and check it in good light. If a faint line is still visible, repeat the process once more. Most hairline cracks vanish after one or two passes, leaving a surface that is ready for sanding and painting.
Tip: Keep the surface barely damp while you work — a dry sponge and a light touch give the smoothest finish. For more beginner basics, see our air dry clay beginner guide.
2. Fill Small Cracks With Fresh Clay Slip

When a crack is too deep for water alone, clay slip is your best friend. Slip is simply air dry clay mixed with water until it reaches a smooth, yogurt-like consistency, and it works like a filler that bonds perfectly with the piece.
Mix a small amount of the same clay you used for your project with water in a little dish. Stir until there are no lumps, then use a soft brush or a toothpick to press the slip into the crack. Push it in firmly so no air pockets remain, then smooth the surface with a damp finger.
Allow the repair to dry completely — at least 24 hours — before sanding it flush. Because the slip is the same material as your piece, it dries to the same color and texture, making the repair nearly invisible under paint.
Tip: Always make slip from the same clay as your project so the color and shrinkage match perfectly. Try this technique on your next project from our DIY clay ideas.
3. Repair Deep Cracks With a Clay Paste Patch

Deep cracks that run through a thicker section need more than a surface fix. A clay paste patch gives the repair real structure, filling the gap from the inside out so the piece regains its strength.
Take a small piece of fresh clay and knead it with a few drops of water until it is soft and sticky. Press it firmly into the crack, working it in from one end to the other, and use a damp sculpting tool to blend the edges into the surrounding surface.
Cover the patched area loosely with plastic wrap for a few hours so it dries slowly and evenly with the rest of the piece. Once fully dry, sand the patch smooth with fine-grit sandpaper and the repair will blend right in.
Tip: Score the edges of a deep crack lightly with a toothpick before patching — the rough surface helps the new clay grip. See how to shape sturdy pieces in our clay tray ideas.
4. Fix Cracks at Joints With Slip and Scoring
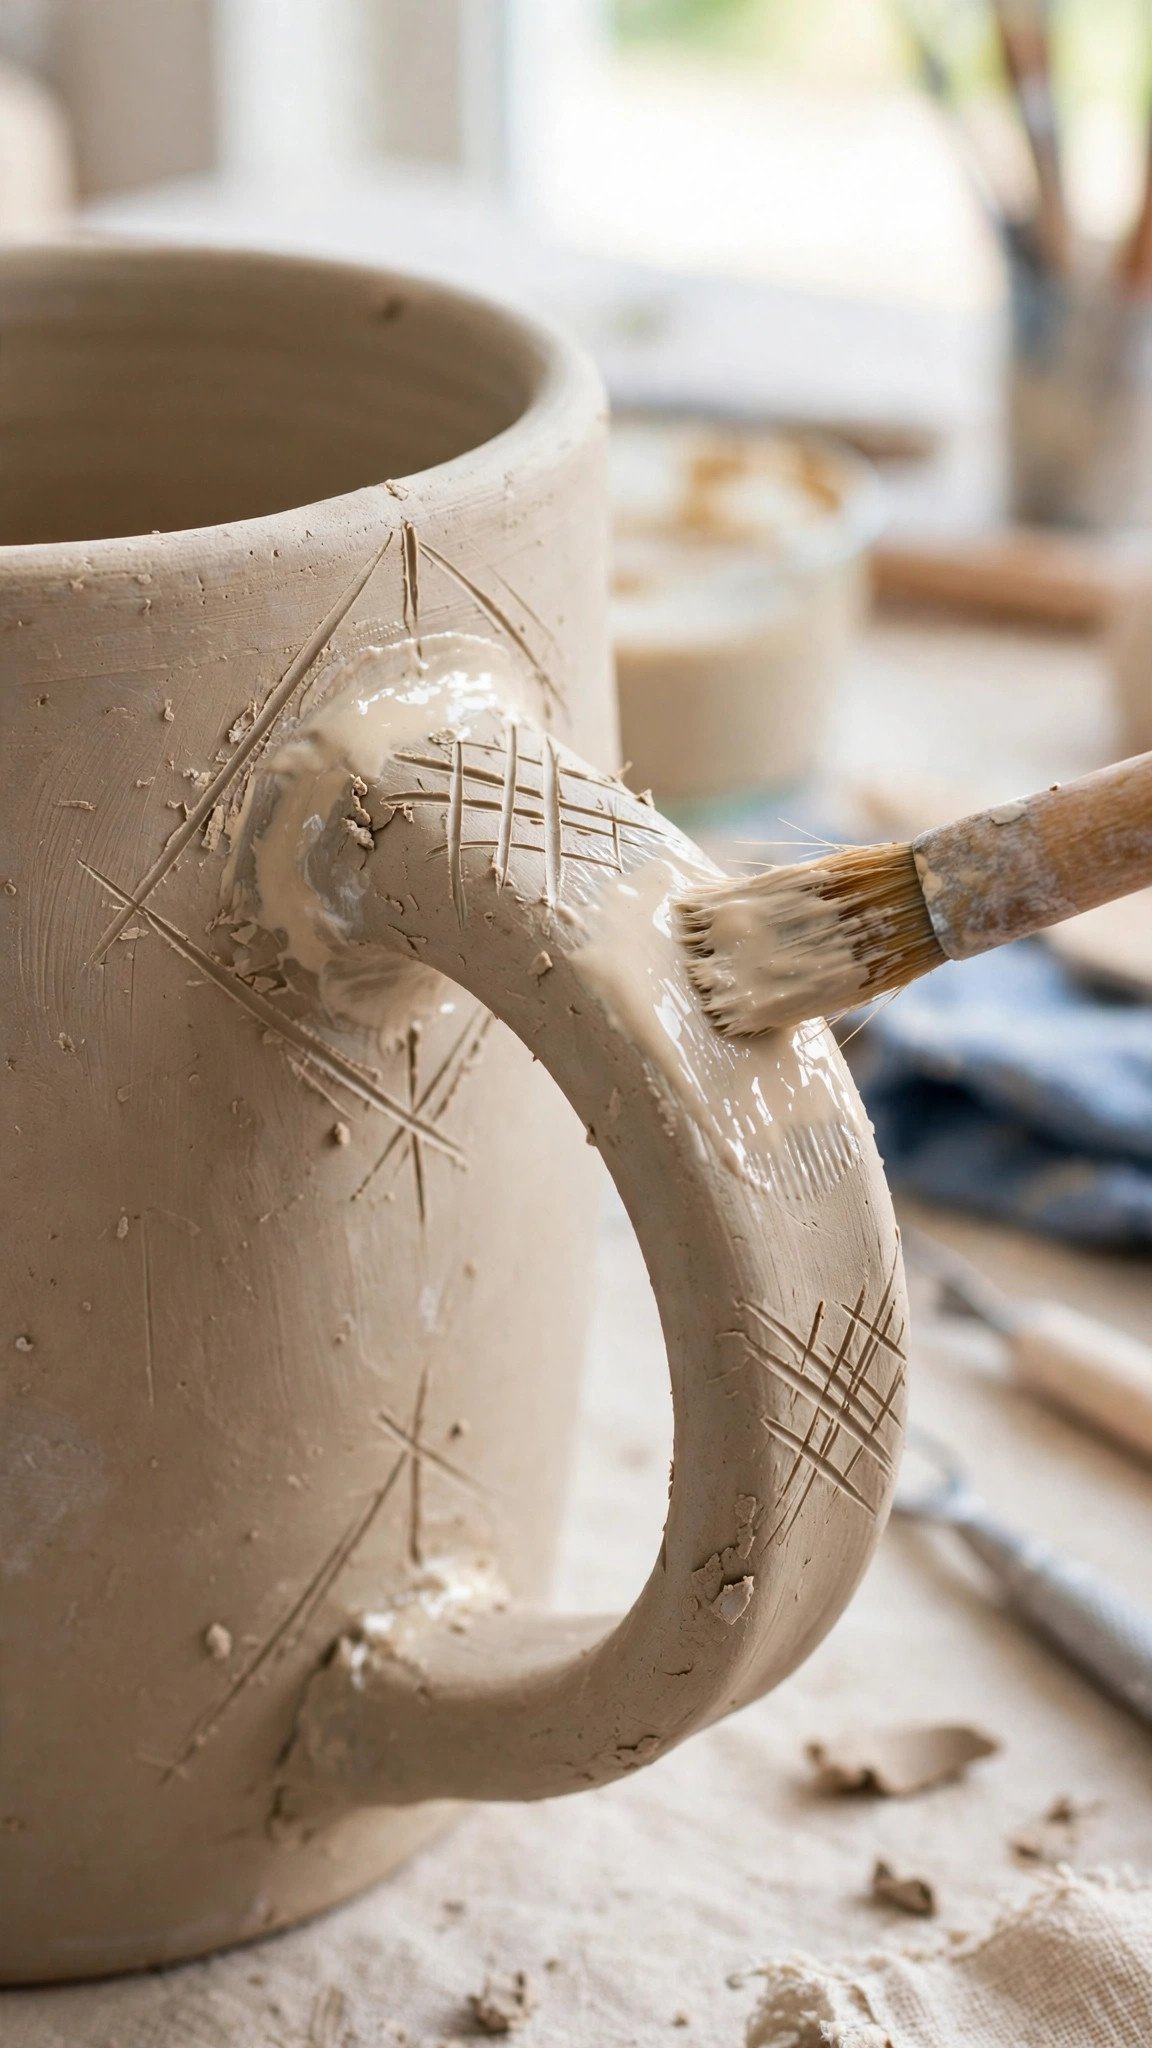
Cracks love to appear where two pieces of clay meet — a handle on a mug, an ear on an animal, a rim on a bowl. These joints dry at different rates, so the seam can split if the pieces were not bonded well in the first place.
To repair a cracked joint, first open the crack slightly and score both sides with a needle tool or toothpick, making a crosshatch pattern. Brush clay slip generously into the scored area, press the pieces back together firmly, and hold them for a minute so the slip grabs.
Smooth the seam with a damp sponge and support the joint while it dries — a small rolled towel or a piece of foam can hold a handle in place. A well-slipped and scored joint is often stronger than the clay around it.
Tip: Never attach clay pieces dry — always score and slip every joint while the clay is still workable. Learn more joining basics in our air dry clay beginner guide.
5. Rescue Dried Cracks With Vinegar and Slip

Finding a crack after your piece has fully dried feels like a disaster, but it is far from the end. A tiny amount of white vinegar can soften the dried clay surface just enough for a slip repair to bond properly.
Dab a little vinegar along the crack with a cotton swab and wait a minute or two. The surface will soften slightly and turn a shade darker. Then press clay slip into the crack with a toothpick, smooth it with a damp finger, and let the piece dry for a full day.
Because the clay is already dry, work in thin layers rather than one thick fill — thick slip on a dry piece can crack again as it shrinks. Two thin layers, dried between applications, give a much stronger repair.
Tip: Use vinegar sparingly — a drop at a time is plenty, and too much can stain light-colored clay. Get inspired for your next make with our DIY clay ideas.
6. Sand and Seal Surface Cracks for a Flawless Finish
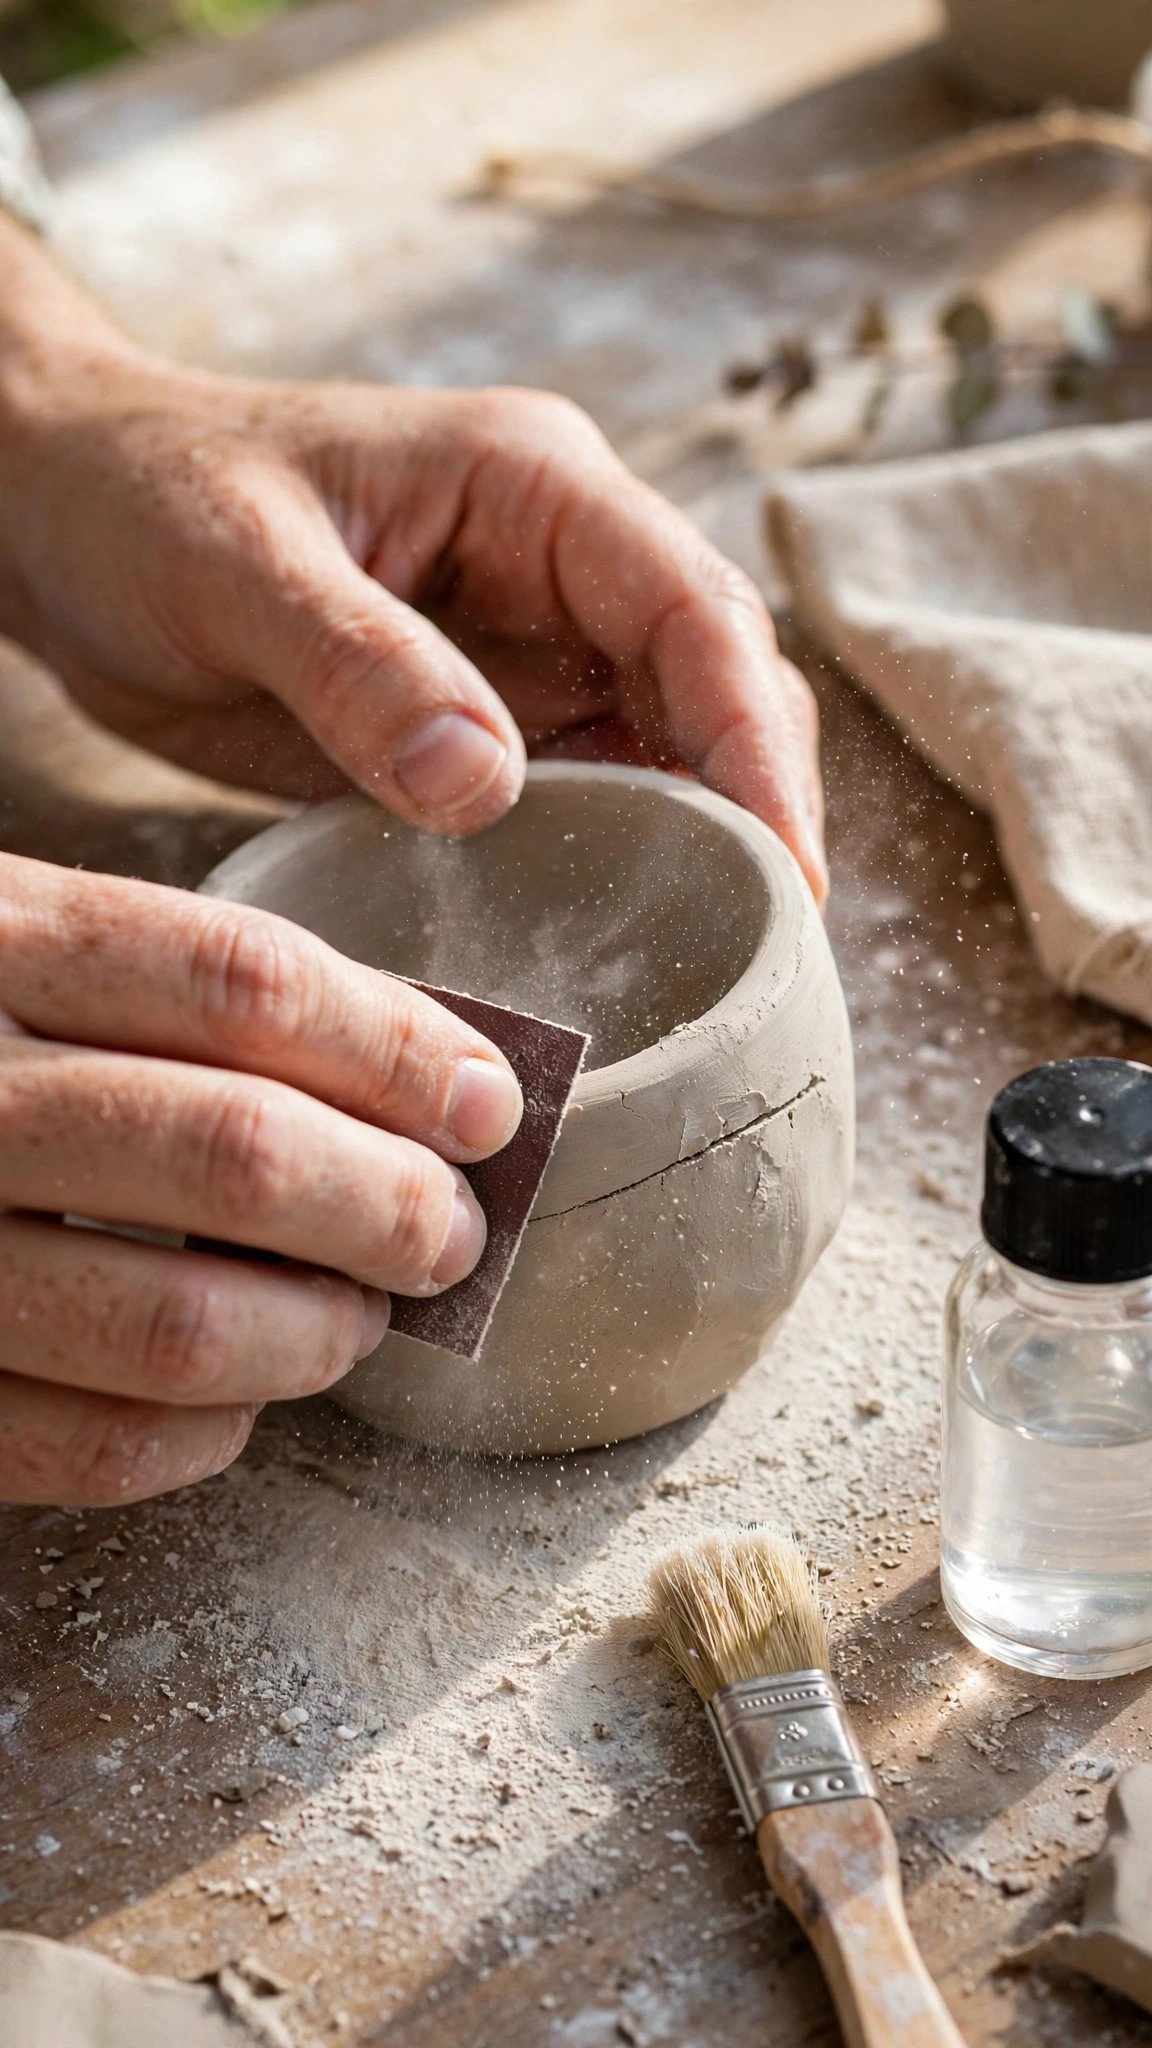
Sometimes a crack is so shallow that filling it is unnecessary — a careful sand and seal will make it disappear. This method works best for fine surface crazing and tiny lines that you can barely feel with a fingernail.
Wait until the piece is bone dry, then sand the cracked area gently with fine-grit sandpaper, around 220 grit. Sand in small circles and brush away the dust often so you can see your progress. The fine clay dust fills the hairline as you sand.
Once the surface feels smooth, wipe it clean with a barely damp cloth and seal it with a coat of Mod Podge or a clear acrylic sealer. The sealer locks the dust into the crack and protects the surface from future moisture damage.
Tip: Seal every finished piece — an unsealed surface absorbs moisture and is far more likely to crack later. See sealing-friendly projects in our DIY clay diffuser stones.
7. Slow Down Drying to Stop Cracks Before They Start

The single biggest cause of cracked air dry clay is drying too fast. When the outside dries and shrinks while the inside is still wet, the tension has nowhere to go — so the surface splits.
Let your pieces dry slowly in a cool room away from direct sunlight, radiators, and fans. Cover thicker pieces loosely with plastic wrap or a plastic bag for the first day, then uncover them to finish drying. Turning the piece over halfway through also helps it dry evenly.
Thick pieces can take three to five days to dry completely, and that patience pays off. A slow-dried piece is stronger, smoother, and far less likely to develop cracks in the first place.
Tip: If your room is very dry, place a small bowl of water nearby — a little humidity in the air slows drying just enough. Start your next slow-dried project with our air dry clay beginner guide.
8. Strengthen Thin Spots With a Backing Layer

Thin areas — the base of a bowl, the wall of a vase, the edge of a tray — crack because they dry first and carry the most stress. Adding a backing layer reinforces the weak spot and stops the crack from spreading.
Roll out a thin sheet of fresh clay and cut it slightly larger than the cracked area. Score the back of your piece and the patch, brush both with slip, and press the patch on firmly, smoothing the edges so they feather into the original surface.
Let the reinforced piece dry slowly under plastic wrap for the first day. The extra layer adds strength without changing the look of the front, and the crack underneath is sealed permanently.
Tip: Keep walls at least a quarter-inch thick on functional pieces — thin clay looks elegant but cracks easily. Find sturdy project ideas in our clay tray ideas.
9. Hide Repaired Cracks With Texture and Paint

Even a good repair can leave a faint line, and that is where clever finishing comes in. Texture and paint are the easiest ways to make a repaired crack completely invisible.
Before painting, press a lace doily, a stamp, or a piece of burlap gently into the damp repaired area to add texture. The pattern breaks up the surface so the eye never catches a straight line. Once dry, sand lightly and apply two thin coats of acrylic paint.
A slightly textured or speckled paint finish hides far more than a flat glossy one. You can also add a band of contrasting paint or a gold-leaf edge right over the repair — it looks intentional and beautiful.
Tip: Paint in thin coats and let each one dry fully — thick paint can crack over a repair just like clay does. Get painting inspiration from our DIY clay diffuser stones.
10. Prevent Future Cracks With Proper Kneading and Storage

The best crack repair is the one you never have to make. Most cracks trace back to two things: clay that was not kneaded properly, and clay that dried out before shaping.
Always knead your clay thoroughly before you start — at least two or three minutes — until it is smooth, even, and free of air bubbles. Trapped air expands and contracts as the clay dries, creating cracks from the inside. Wedge the clay by folding and pressing it repeatedly to push the air out.
Store unused clay in a sealed bag with the air pressed out, and keep a damp cloth over your work while you shape it. Clay that stays evenly moist while you work dries evenly later — and evenly dried clay rarely cracks.
Tip: If your clay feels stiff, knead in a few drops of water until it is soft and pliable again — never try to shape dry, crumbly clay. Master the fundamentals with our DIY clay ideas.
Conclusion
Cracked air dry clay is not a ruined project — it is a normal part of working with a natural, water-based material. From a quick fingertip smoothing to a proper slip-and-score joint repair, there is a fix for almost every kind of crack.
The real secret is patience: slow drying, thorough kneading, and well-bonded joints prevent most cracks before they appear. And when one does show up, you now have ten reliable ways to repair it.
So pick up that cracked piece, try the method that matches your crack, and finish it with pride — your next clay project will be stronger for everything you learned from this one.